Hi There,
Jasmine here-Community Manager with monday for nonprofits! I am excited to share that our team will be releasing articles here on the community forum to help guide you through some of the most inquired parts of the monday.com for nonprofits experience!
Today, we will begin with Part 1 of a 3-part walkthrough of how to use our “Volunteer management template.” For your reference:
- Part 1: Review the volunteer database for recruitment and volunteer work allocation
- Part 2: Review the volunteer feedback form, work tracker, and dashboard
- Part 3: Review how to manipulate volunteer data for your purposes
So…What is the “Volunteers management template?”
This is a customizable solution for our monday for nonprofits users to help with all of your volunteering management needs! Recruit volunteers, assign them tasks, and manage their progress in your nonprofit organization all within monday.com.
![]() NOTE: You will need admin controls to your monday.com account to access this template! Don’t have access to a monday admin account? You will need to request admin status from the admin on the monday account OR use the admin account to add this template!
NOTE: You will need admin controls to your monday.com account to access this template! Don’t have access to a monday admin account? You will need to request admin status from the admin on the monday account OR use the admin account to add this template!![]()
Let’s get into it and talk through how to this template:
VOLUNTEER DATABASE WALKTHROUGH
-
Make sure you have the “Volunteer management” template downloaded and open. Don’t have the template? No worries, you can download it super easily right HERE.
-
You will begin using the “Volunteer database” board within the “Main Table.”
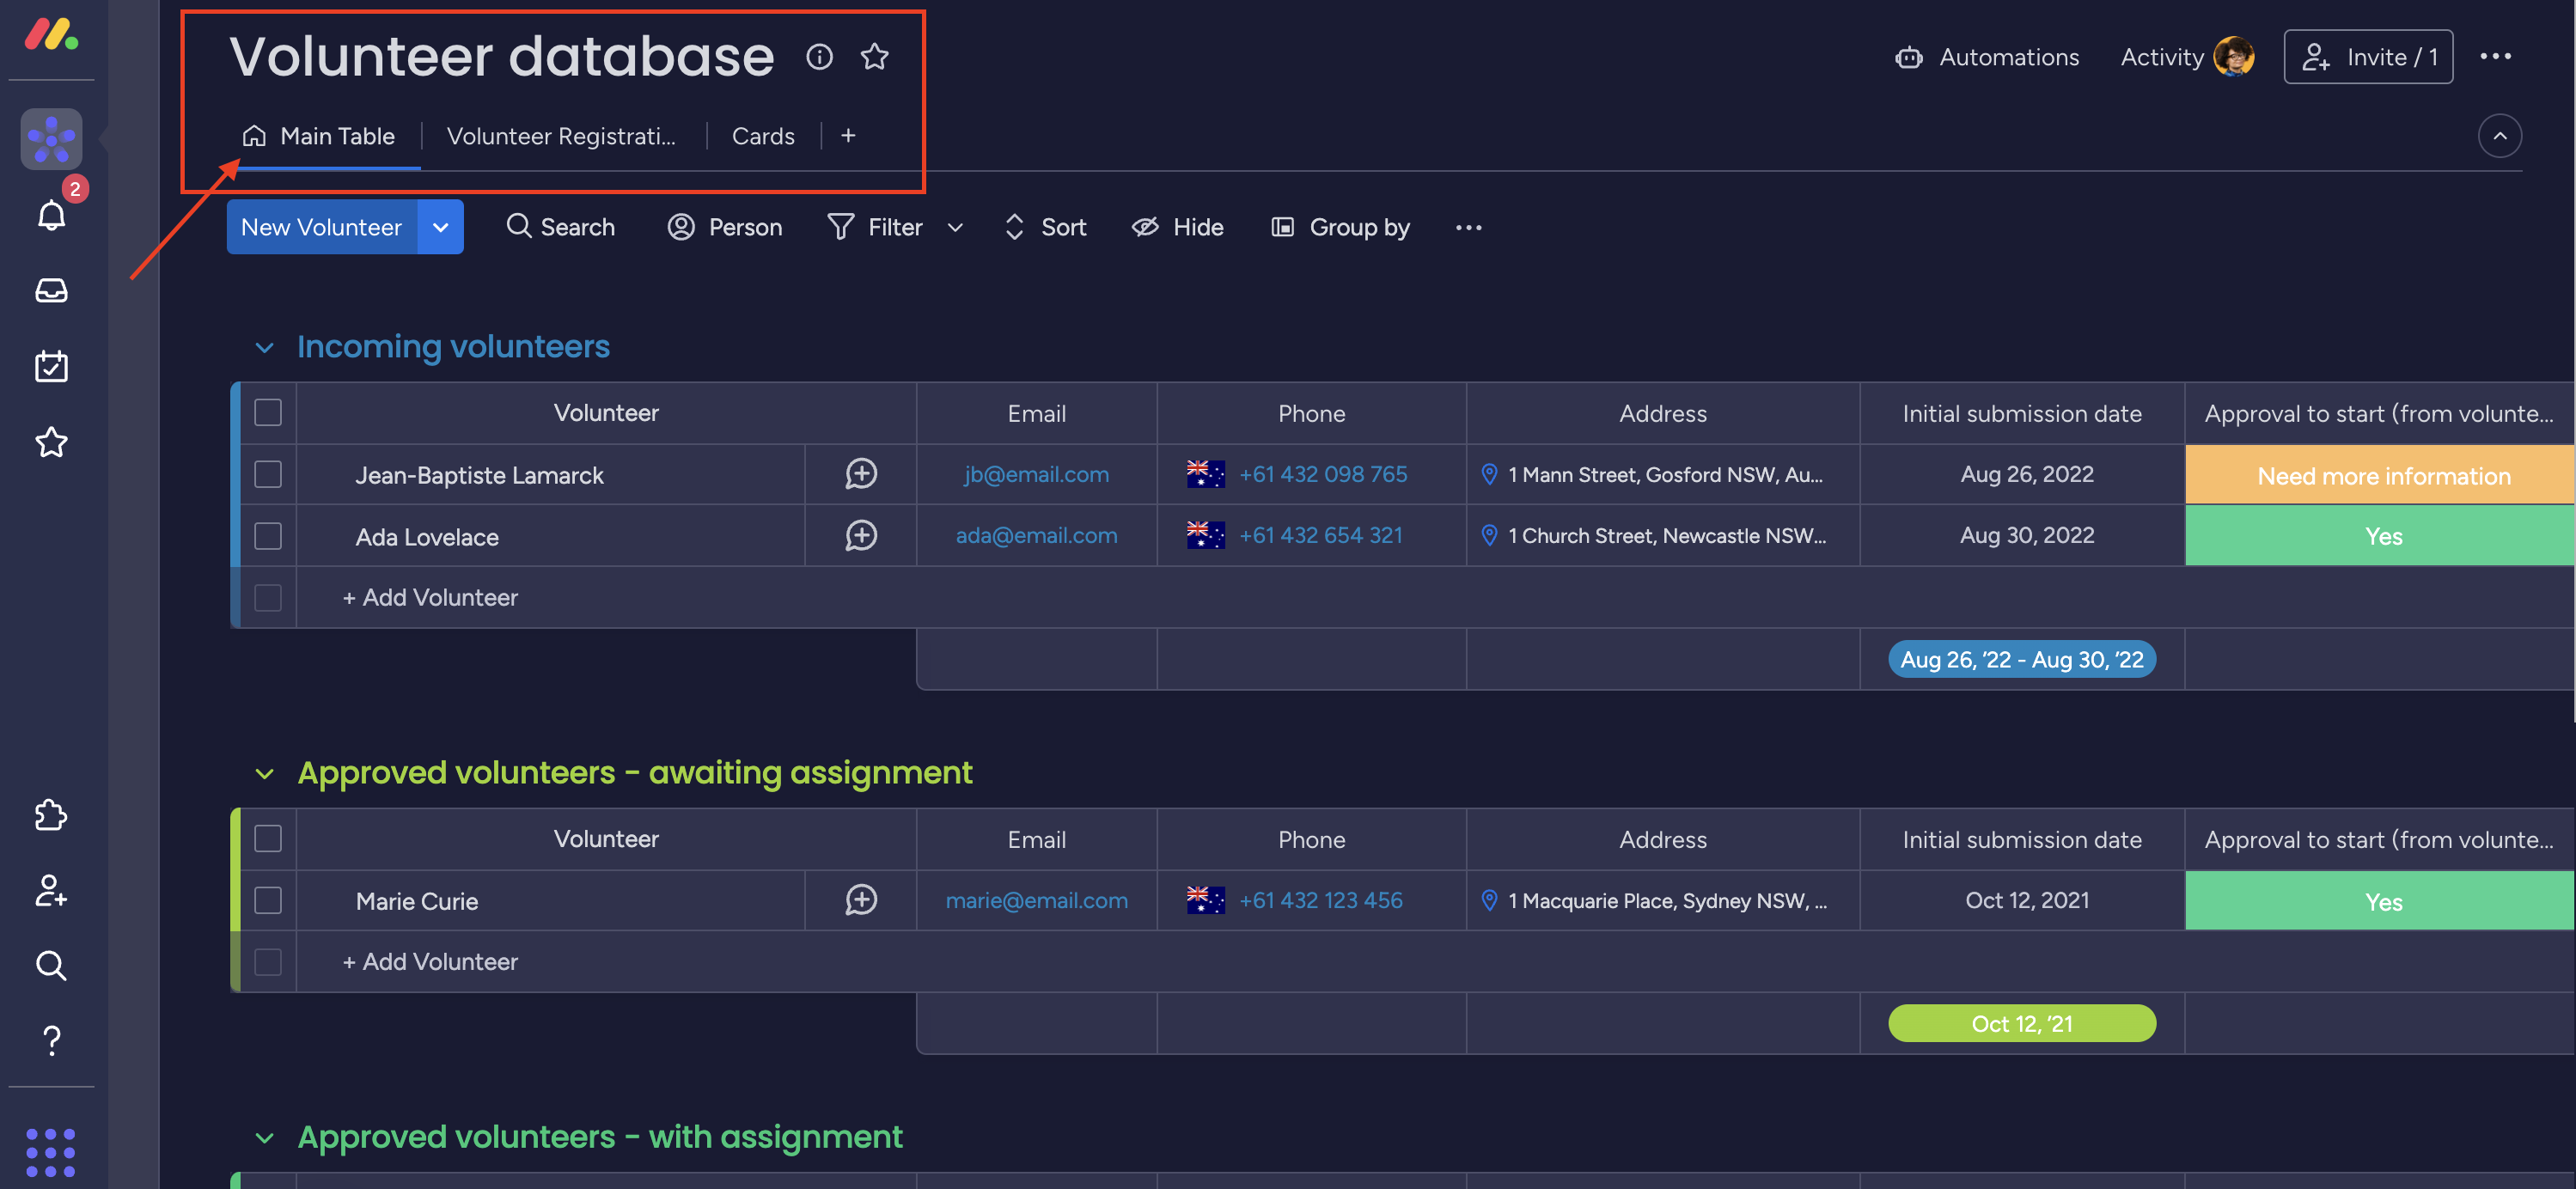
-
After reviewing the information within this board so that you can understand the functions of the board with a example use case, we recommend that you delete the items and change the language within the board to work for your organization. This is a template, after all! We want you to make it yours!
- NOTE: When deleting and making the board your own, we highly suggest that you keep the overall structure within the board the same as there are functions and formulas connected to other boards within the template, especially with the at the far right of the board!
-
Now that you have adjusted the information to fit your needs, we will focus on the view that your volunteers will see when registering to work with you. Switch over to the “Volunteer registration form” view! T his is the form that can be sent to your volunteers to receive their information.
-
From here, we recommend use the form in this “Preview” version of the form before making edits to the form, so that you can understand how the form functions for your volunteers. Answer the questions and see how the answer come-up in the “Main Table” view.
- NOTE: The “Are you ready to enroll as a volunteer now” option has drop down options with different functions that open the form more. Please explore these!

-
Once you have viewed the preview of the form and how the answer populate, return to the “Volunteer registration form” view to make it your own. Here you can find the “Edit Form” button at the top, left-hand corner of the board to adjust the look (logo, colors, and font) and questions within the form to serve your purposes. Don’t forget: These questions are synced with the “Main Table,” so make sure your adjustments line up with the main board!
- NOTE: We recommend that you try using the form in the “Preview” view again after you have made adjustments and then take a look at how the responses show up in the “Main Table” to make sure everything is correlating as you need.
-
Now that your form is ready, this form can be sent directly by email or text via link, embedded directly into your organization’s website, or even shared on all major social platforms for easy access by your future volunteers! Just click the “Share Form” button at the top, right-hand corner of the form to access the sharing options.
- NOTE Your prospective volunteers do not need to have access to a monday account to use this form! Isn’t that great?


- All responses from volunteers will show-up in the “Main Table” view under the “Incoming volunteers” group and will remain here until you are ready to approve them for work.
VOLUNTEER WORK ALLOCATION WALKTHROUGH
-
At this point, you should be receiving applications from your amazing prospective volunteers and you are ready to allocate work! Return back to the “Main Table” view of the “Volunteer Database” to begin placing the volunteers you have received.
-
As forms come in, you will see that there are columns within the “Main Table” that are automatically filled in based on the prospective volunteer’s responses, but there are other columns that you will need to fill in yourself to begin the placement process. These include:
- Approval to start (from manager): This will give the manager of the prospective volunteer an opportunity to review the application details and/or hold interviews for the volunteer before they are moved forward within the volunteer workflow
- Manager: This is a “People” column where you can select a person on your team that is connect with monday that will approve and manage each volunteers’ placement
- Current status: Indicates where the prospective volunteer is within the volunteer placement process. This should remain as “Pending” before approval happens.

- Once you have gone through your necessary volunteer approval process, you can mark your prospective volunteer as “Approved” in the “Approval to start from manager” column to continue them through the volunteer workflow. Doing so will automatically shift this volunteer into a new group called “Approved volunteers - awaiting assignment” and their Current status will adjust to “Awaiting assignment”.

-
It’s time to shift over to the “Volunteer work allocation board” to begin assigning your volunteers that are awaiting their assignments! The first step in using this board is that you should customize this board. Clear the example use case responses and add your projects within the parameters of the format of the board. Something important to keep as you customize - We have built out three options of volunteer assignments groups, as well, for you to work from:
- Work to be assigned: Any new assignments that have yet to be distributed to volunteers
- Work assigned: Assignments that have been given to a volunteer
- Finished work: Assignments that have been completed

-
Once you have your volunteer assignments within the “Volunteer work allocation board” and have a particular assignment you’d like to fill, you will shift back to the “Volunteer database” board’s “Main Table”
-
Select the “Filter” button at the top center of the board to begin looking for your available volunteers. It is time to select the criteria of your search. We recommend trying to following options to narrow your choices of available volunteer keeping in mind that you may have adjusted the wording on these sections for your own needs!
- Filter 1: Column = Current status is Active or Awaiting assignment
- Filter 2: Column = Earliest Start Date is Before Exact Date Start date of program
- Filter 3 (if applicable): Column = Volunteer Sites is Name of site
- Filter 4 (if applicable): Column = Subjects is Subject of choice
- NOTE: As you are narrowing down these filters you will see the board narrowing down your options in the background. You will be left with the only applicable volunteer options after narrowing down your filters. Additionally, this narrowing down is super helpful as you begin to get more specific about what you need to not only show you how many people are available and the gaps that you may have in your volunteer availability.
-
Now that you have your narrowed down volunteer options, you can decide which volunteer you would like to place for the specific assignment you have in mind. You will scroll to the left of the row that this volunteer’s information is within, until you get to the columns for “Work allocation” and “Current work end” which are underlined in GREEN. These two columns are directly connected with the “Volunteer work allocation board” and when altered, will make changes within that board.


-
Click on the “Work allocations” column for the selected volunteer and you will see a dropdown open with the groups and their tasks from the “Volunteer work allocation board”. Select the appropriate task from the “Work to be assigned” group by clicking the checkbox beside the task you want which will automatically assign your chosen volunteer to the assignment. At this time, the “Current work end” column will automatically update with the chosen assignments timeline which you have already entered into the “Volunteer work allocation board”.
- Note: At this time you can revisit the “Filter” button and clear the filters. This will allow you to see that your chosen volunteer has now been moved to “Approved volunteers - with assignment” group within the “Volunteer database”.

- At this time, you will go through your desired contact system to let your volunteer know that they have been given an assignment. You should revisit your “Volunteer work allocations board” and mark the “Volunteer confirmed” column as “Working on it” until they are officially confirmed. Once the volunteer approves of their assignment and your team is aware, you will revisit this column and change it to “Confirmed” which will move your volunteer to the “Work assigned” group in this board.

P.S.: If you would like to watch a video to walk you through these steps, you can find that here from markers 0:00-13:25: Volunteer Package Full Walkthrough
And that is Part 1 of our “Volunteer management template”–Congratulations! You did that! Part 2 of this template will continue through the volunteer process with how do you track the progress and completion of a volunteers assignment.
Let us know how the template is treating you or if you have any questions/feedback about the template by joining our monday.com for nonprofits Facebook community: monday.com for nonprofits community | Facebook